Product reviews are one of the main types of blog post articles in affiliate marketing.
It is critical for bloggers to know exactly how to do them in a way that satisfies both the search engines (so that the article gets ranked higher and receives more traffic) and the audience reading them (so that the readers follow the blogger’s advice and strongly consider purchasing the reviewed product).
In this guide, we will go through my step-by-step process of creating product reviews that rank high and successfully convert readers to buyers. The guide contains the wisdom that only comes after writing hundreds upon hundreds of blog posts that rank highly on Google.
That’s why this guide is pure money. It is simply a blueprint for generating profits through blogging!
Honestly, I’ve never seen a blog writing process described in this much detail. Not even paid courses on blogging and SEO teach you how to do this! This sure is something I wish I had access to when I first started out, and I believe it will be of immeasurable help to new bloggers.
- What to know before writing a product review
- How this guide works
-
Product review blog post writing process
- Start a new post
- Placeholder title
- Research the product
- Research the competition
- Additional Google research
- Reflect and empathize with your readers
- Create the header structure
- Write the content
- Create lists and tables
- Add the product specifications table
- Place the “Table of contents” widget before first H2 header
- Add the author widget
- Select the category
- Set the permalink
- Link out to high authority sites
- Link out to your content
- Create graphs, charts, infographics, and illustrations (if applicable)
- Add images and their alt-tags
- Add the featured image
- Add some strategic bolds
- Correct spelling, proofread, and edit
- Read the article one more time as a whole
- Craft the title, use the keyword and add some usefulness or intrigue
- Publish
- Add internal links to your post from other articles on your blog
- Promote the blog post
- Shoot a video for the blog post
- Summary
What to know before writing a product review
Before we get into the tactical details of how to create the perfect product review blog post, there are a few points you should be aware of.
Starting is much more important than perfection

If this is your first blog post, the most important thing you should keep in mind at all times is that done is better than perfect!
It is much more important to get to a point of hitting that “Publish” button than to fear inadequacy, chase perfection, and endlessly procrastinate.
Just follow the process described below, make your first article as good as you can make it, but more importantly, get to a point of good enough, and publish it.
I strongly recommend adopting this mindset because, if this is your first article, you will never get it perfect no matter how much time, effort, and worry you put into it. You simply won’t.
What will get you closer to perfection is mastering the process, and the only way to do that is to repeat it over and over again. As you get better at this, you can always return to your previous articles and improve them.
Digital Marketing Empire team members will have a huge advantage here over regular bloggers who are just starting out. You will not only receive world-class training on this process, but you will go through an intense onboarding process where you will closely work with me or another team member and see exactly how to do this right from the very first attempt. If you’re not a member but that sounds good to you, you can apply to join the Digital Marketing Empire team and start training, working, and earning with us.
In any case, the point is to get your first article to a point of good enough as soon as you can, and then publish it and move on to the second article, and then the third one, etc. That is how the blogging game is won.
In what phase of the buyer’s journey do product review blog posts fit in?
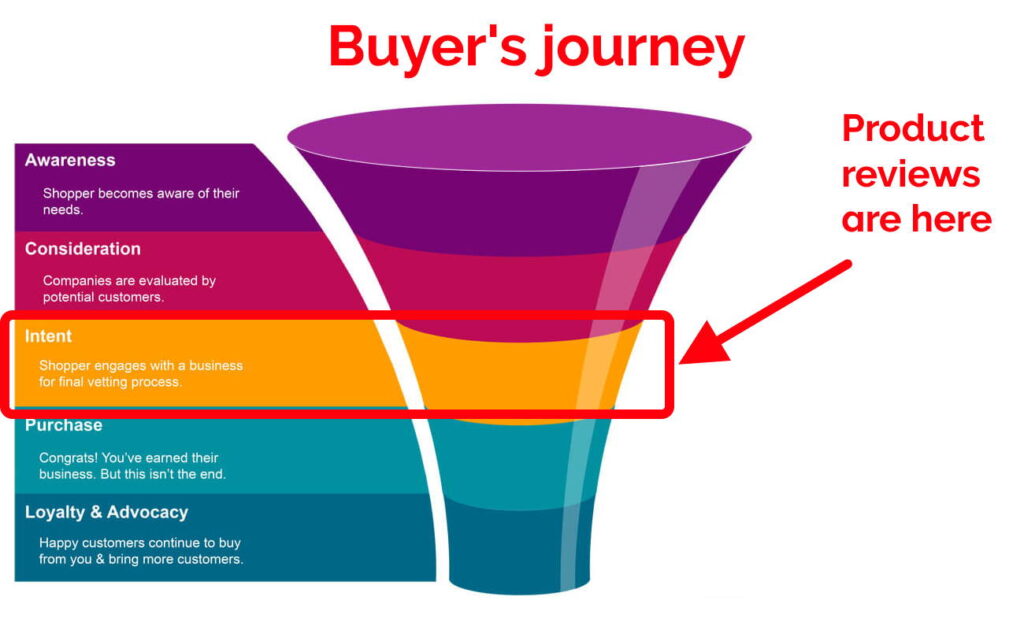
Traditionally, a product review blog post has probably been the most common type of blog post found on the vast majority of affiliate blogs.
Typically, this type of content is consumed by people who are in a more advanced phase of the buyer’s journey, probably even the last phase. They are already aware of the need they have or the problem they need solving, they already know what type of product they might need, and they’ve probably narrowed down the choice of products to several items at this point, one of which might be the product they’re reading the review for.
That means people who are consuming this type of content are usually ready to buy a product, and this is what makes product reviews very lucrative for bloggers.
However, that means a lot of other marketers and bloggers will be competing for this audience’s attention besides you.
Competing with big websites
Today, a large majority of the product review blog posts that rank on the first pages of search engines come from large publications. The Internet is getting kind of crowded, especially when it comes to reviews of well-known and popular products that sell well. Smaller and newer blogs will likely have a tough time ranking for these topics, even when they create content that’s truly remarkable.
I’ve seen this in many of my own blogs. In almost every popular niche, there are already several large and established websites that publish a lot of content and have a lot of authority in the eyes of search engines. Oftentimes, the content these websites publish is not even that good, but since search engines already trust them, they get their product review articles ranked quickly and easily.
On the other hand, smaller and newer blogs either have to wait months (or even years in some cases) to see their product review articles rank close to the top of the search results (usually never n.1 for the most competitive products). Often, they simply never break through on the first page of the search engine results.
That’s just how blogging works. It may not sound fair, but that’s the reality of it today.
That still doesn’t mean that new and small blogs shouldn’t work hard on creating great product review blog posts. It’s just that they have to be smarter about it, and be prepared to work a bit harder than the competition in some cases.
While a smaller blog may not get a lot of traffic to their product reviews initially, they should still create them, and create a good amount of them. In fact, in a lot of cases, they may never even rank on the first page, and still, they should create a lot of product reviews.
There are several good reasons for that:
- the rest of your content will often link to your product reviews, and they will get both some link juice from your own content and a bit of traffic
- your product reviews can sometimes (not often, but sometimes) link to other content of yours, which helps your blog in general
- an affiliate blog without any product reviews will not be a complete body of knowledge on the topic you’re covering, and both your audience and search engines might have a harder time believing in your expertise because of that
- while less often than a few years ago, some of your product reviews will still rank well, especially the ones of less popular products, and they will still earn you good money
In a way, the advantage of the big publications is also their disadvantage. Since they are usually big companies, it’s not very profitable for them to devote time to creating content on smaller, less popular products. They usually don’t publish product reviews on products that only have a few dozen monthly searches. For smaller bloggers, however, these products are still good targets, and targeting lower-volume keywords is a very good strategy they should adopt.
Plus, while big publications have a lot of authority in general, their authority tends to be more general and more spread out. While they may publish product reviews, they will often not bother with the more educational type of content, and that type of content is what gives affiliate bloggers a different kind of authority, which is the topical authority. In some cases, it just happens so that a smaller but more focused blog still outranks a larger publication because of this more focused, more relevant authority, and that’s another strategy that small blogs must master and apply if they’re looking to compete successfully.
And, finally, we will see how we can even take advantage of all of this and win even the most competitive keywords that might be held by large and established websites. We’re talking about the Digital Marketing Empire network of blogs, of course, but more on that below.
Owning vs not owning the product you are reviewing

One advantage that larger publications will sometimes have (although not too often) is that they will have an easier time getting access to the products they are reviewing. This can be especially challenging for new bloggers that have truly limited resources.
Clearly, it’s a lot better to review products that you can actually hold in your hands.
The biggest reason for this is because search engines, particularly Google, seem to be able to determine the relationship that the author of the blog post has had with the product they are reviewing. It’s probably even not that difficult for the search engine algorithms to determine this – we can simply observe, especially lately, that product reviews that use a lot of phrases like “I”, “me”, “my experience”, “liked/didn’t like”, and other phrases that clearly indicate the person has had personal experience with the product, tend to rank higher.
Simply put, it’s best if you can get access to the product you’re reviewing. You can buy it, borrow it, order it and return it after you’ve reviewed it, or maybe do an interview with a person that has actually owned the product.
If, however, you can’t get access to the product, or it’s simply still unfeasible for your business to do that, you shouldn’t despair. I and countless other bloggers have had great success reviewing products that we’ve never seen or touched. It’s not like there’s a rule that says you must own the product you’re reviewing.
You shouldn’t lie here. It’s just not a good long-term strategy.
What you should focus on instead is providing other forms of value to your audience.
You should focus on offering clear and detailed information on every aspect of the product, and provide your theoretical expertise in the topic as someone that has researched it thoroughly. This will include offering your opinion, advice on which type of person would have the most use of the product, comparisons to other products, etc. I’ve seen people build large blogs with hundreds of articles on products they’ve never even seen. They still did provide advice, expertise, and guidance to their audience, so they’ve more than earned their success.
Personally, I’ve done product reviews on both products that I’ve had and products I haven’t had. Both can work, but the ones where I had the product perform a lot better (both in search engine rankings and in converting the readers to buyers), especially when I’ve had the product for a while and have had the opportunity to provide some interesting insight about it that only a long-time owner could.
Topic expertise
When it comes to affiliate blogs, expertise can sometimes mean a lot of different things.
On the surface, it may sound like owning a product for a long time, or being practically involved in the field around the product for a long time, to be the best form of expertise. And sure, some skin in the game helps tremendously.
But as bloggers, I believe that our primary responsibility is to not only experience things for ourselves, but try to relate to as many different types of members of our audience as we can, empathize with them, put ourselves in their shoes, and offer them guidance from a place of understanding.
And to achieve that, we should aim to gain as much practical experience in the field as possible.
However, no matter how much time we spend becoming experts, we will never be complete masters of a field. That’s just how the nature of knowledge is – you can never know everything, especially not from first-hand experience.
That’s why bloggers need to have a strong theoretical background as well. We must learn from the experience of other people. Otherwise, we will spend our entire lives pursuing experience, and we will only end up with a fraction of all the knowledge that’s available to us anyway.
This is why it is so important to fully immerse yourself in the topic you’re covering.
Again, even a bit of practical experience will go a long way here, but maybe even more important than that is to learn as much as you can theoretically. You don’t have to spend all of your time reinventing the wheel.
Simply read as much as you can about your topic, watch as many videos as you can, and spend as much time thinking about it as you can. These three processes alone will already make you an expert in the topic, and you will be able to provide a ton of value to your audience.
Also, the next step after reading, watching, and thinking, is getting involved with some data.
Data and specifications of the products you’re reviewing
My favorite way of gaining deep knowledge about a topic is to create a spreadsheet where I will list all of the products and all of their data and their specifications that I can find online.
“Specification” is simply a dimension or an aspect of the product that can be easily measured. For example, if we’re in the niche of laptops, then specifications for laptops are the laptop’s memory in GB, the frequency of the CPU, the length and width of the laptop, its weight, its battery life, etc.
Usually, every piece of specification will be a column, and you can sort and filter based on all of the data you’ve collected (which works great for other types of blog posts, too, like comparisons and list articles).
Just the simple act of collecting all of this data and having it easily available and ready for viewing it in different ways has given me a ton of insight into a topic, and I’ve found that it not only helps me with gaining confidence and experience in the topic, but also to speeds the content production process significantly. In fact, just the fact that you’ve made the effort to collect all of this data and inspect it carefully already makes you an expert compared to the average member of your audience – you simply have a bird’s eye view of the topic that very few people have.
How this guide works
For starters, this same guide will be available for free on my Youtube channel in video form. For some aspects of this process, the video format may be more easily digestible for most people, which is why I recommend trying to consume both formats.
Chances are, if you are new to blogging and you are looking to master the craft, and especially if you like the way I personally perform this process, you will come back to this guide multiple times. For that purpose, I usually prefer the written format, but in general, at least one viewing of the video will be very valuable, too.
The guide is meant to train people that don’t really know how to blog, and probably are not experts in the topic they’re planning to blog about yet. That is why I will be picking a topic that I’m not personally very familiar with, and you will see me go through the exact steps that you may end up going through later. Keep in mind that I am a bit interested in the topic, which always helps, and I also plan to devote a lot of time to it later as it will become a real category on a real blog from the Digital Marketing Empire network.
For the purposes of this guide, I will be creating a product review in the wallets niche, the tactical/minimalist/smart wallets niche in particular.
This will be just one of the many niches that the Digital Marketing Empire team and I will work, but I decided to start with this one because there are a lot of products to review, a lot of keywords, and also, there is some competition (which is always great, as it means there is some money to be made in the niche), but nothing too crazy it seems.
Further, I like this niche because it’s easily relatable. Everyone has a wallet, right? The niches that the Digital Marketing Empire team will cover will usually be something like this, popular niches that new writers can quickly adapt to and start creating content on it as soon as possible.
The specific product I chose to review for this guide will be the Dango D01 Dapper wallet. Currently, I don’t own the product, and you will see how I make up for that fact and the kind of value I provide instead.
I chose this product because it has a good amount of search volume, and, again, it already has some reviews from some competitors, which kind of proves the market for this product, but also, in my estimate, the existing competition doesn’t seem to be overwhelming.
I could have chosen to review a product in this niche that had no competition at all, and in the real world, whenever you can spot keywords like that, keywords for product reviews that have some search volume and absolutely no competition for it, you should always go for them. You will simply rank a lot quicker, even with a new blog, and you will start earning money from your content a lot sooner. But I wanted to show you how to evaluate the competition as well, and how to know to create content that has a good chance to outperform theirs.
Also, I could have chosen to review a product with insane search volume and competition from huge websites. In the real world, I actually like doing that quite often, probably much more often than what most digital marketers recommend, but I still don’t like doing it at the very beginning of the blog. A blog that is supposed to be trusted and authoritative simply must have certain pieces of content. Imagine trying to present yourself as an authority in smartphones, for example, without a review of the latest iPhone. It just doesn’t sound right, does it?
Even if you know full well that you may never rank on page 1 for that keyword, you should still do it.
Plus, you shouldn’t be afraid to pick a fight with a bigger competitor every now and then, because as it so happens, you will even win at times (remember, nobody knows exactly how the search algorithms work, and underdogs do win at times).
That’s why I chose a product that has some competition, and you will see my process for evaluating it and how I create content that is better in at least some aspects. At the same time, I didn’t choose a product that I would have almost no chance of ranking for yet, as that’s not a good strategy for a new blog.
So, this is not a drill. This will be an actual blog post on FutureHowTo (the first one, actually), which is one of the blogs in the Digital Marketing Empire portfolio.
This guide assumes a general knowledge of writing in WordPress. If you are unfamiliar with something, check out the guide on how to create a blog post in WordPress. To keep this guide clean and simple we will assume a familiarity with the basic elements. If you’ve never touched WordPress in your life, don’t worry, it’s very easy to use and millions of non-tech-savvy people use it for their businesses every day. Just go through the guide first and you’ll figure out WordPress later, I promise you it’s super simple.
The video format of this guide will demonstrate how I do this live and in real time. You can see me type out the actual words in the WordPress editor, make all of the mistakes, perform all of the additional Google searches, etc. That’s why the video will be quite long. This guide, however (the textual blog post), will not show the actual writing process (it kind of can’t, really), but you can still see the final result of the process at the live URL.
I’ve done four forms of research before creating this guide:
- market research, or niche research – that was me going through several ideas for promising niches, and finally deciding on the one I will work on myself (I will demonstrate that process in another guide, you don’t really need it for the actual writing process, and if you’re a Digital Marketing Empire team member, you don’t need it at all)
- topic research – this was me going through several other blogs and Youtube videos about the topic, because, as I said, I’m not very familiar with it yet, and I haven’t had a lot of personal experience with it (I don’t really think this process needs to be demonstrated, just consume a lot of educational content around the topic)
- keyword research – this was me trying to identify the best keywords for me to start writing on (I will demonstrate this process in another guide, but, again, if you’re a Digital Marketing Empire team member, you will not need to worry about this, either)
- data and specification research – I’ve gathered the data and the specifications on the product I’m about to review, as well as a few other popular products in the niche, just so that I have a clearer picture of how the product compares against its competitors, what are its strengths and weaknesses, its value proposition, etc (I will also demonstrate this process in another guide, and, again, Digital Marketing Empire team members will not have to do this for the most part)
Speaking of Digital Marketing Empire team members.
Note to Digital Marketing Empire team members
If you are not a member of the Digital Marketing Empire team, you can skip this section, after strongly considering joining the team, of course. The process for writing a successful product review that ranks and compels readers to buy the product is mostly the same whether you’re a member or not, with several small exceptions.
If you are already a member, as I already said, all of the market, keyword, and data research will already be done for you, as well as potentially the header structure, the category selection, and the images in some cases, especially if you’re in the training phase.
We will also do a lot of the editing together, although you should do as much of it as possible on your own, too.
Your biggest point of focus should be the topic research. If you still haven’t started writing, that’s probably the biggest thing you should be thinking of. Get as familiar with your topic as much as possible. When you feel ready, you will find that you simply have to follow the steps outlined here, and you will be well on your way to building your passive income stream.
Ok, now let’s dig in.
Product review blog post writing process
What follows is a detailed tactical guide on how to write blog posts that will move the needle for you and your business, in a way that’s clean, simple to replicate and follow, and results in a compelling piece of content for your readers to enjoy, share, and take the next steps you recommend them to take.
After you’re confident in your knowledge of the topic in general, and you’ve selected the product you’re about to review, and you already have the data and the specifications for it, it’s time to start working on the blog post.
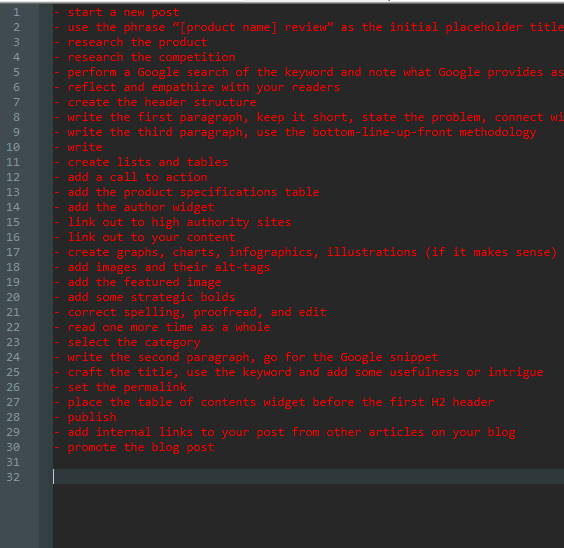
These are all of the steps for creating the product review from start to finish:
- start a new post
- use the phrase “[product name] review” as the initial placeholder title (this will also be the keyword we’re trying to rank for)
- research the product
- research the competition
- perform a Google search of the keyword and note what Google provides as the autosuggest results, related searches, and in the “people also ask” section
- reflect and empathize with your readers
- create the header structure
- write the first paragraph, keep it short, state the problem, connect with the reader, try and use the keyword
- write the second paragraph, go for the Google snippet
- write the third paragraph, use the bottom-line-up-front methodology
- place the table of contents widget before the first H2 header
- write
- create lists and tables
- add a call to action
- add the product specifications table
- add the author widget
- link out to high authority sites
- link out to your content
- create graphs, charts, infographics, illustrations (if it makes sense)
- add images and their alt-tags
- add the featured image
- add some strategic bolds
- correct spelling, proofread, and edit
- read one more time as a whole
- select the category
- craft the title, use the keyword and add some usefulness or intrigue
- set the permalink
- publish
- add internal links to your post from other articles on your blog
- promote the blog post
- shoot a video for the blog post
This may seem like a long process, but that’s because it’s complete. You will not miss anything by following it, you will not have to worry about any additional SEO practices or mistakes, and the result will always be a full, complete, perfect product review blog post. After following it a few times, you will become very efficient with it, and you will craft amazing, in-depth, high-quality blog posts in something around 3-4 hours.
Now let’s check out each of the steps individually.
Start a new post
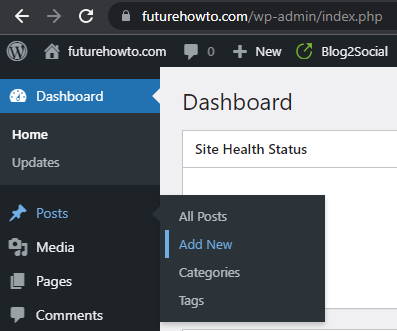
As any great post in WordPress history has started, you will click the “Add New” button or menu item.
Placeholder title
You should always craft the real title of the blog post after the content is fully done.
A great title for a blog post essentially has two parts – the keyword part, and the added value or intrigue part. As you will notice, a lot of the competition just use the keyword as the title. They are leaving a ton of search engine results real estate on the table that way.
By adding a second part to the title, something that further entices the searcher to click your article instead of the other ones, you will find that you kind of steal some of their traffic just because of the better title.
I’ve noticed this in a lot of my blog posts. The competition has a title like “this product review”, and my title might be something like “this product review [and exactly who should buy it!]”, and even if I rank n. 2 or n. 3, I end up getting a lot more of the clicks and traffic than the typical n. 2 or n. 3 search engine results get.
And the funny thing is, you can’t really know what the best choice for the second part of the article will be until you write the entire article. You want the title to reflect the content and to provide a real and compelling reason to click it, otherwise, you will be guilty of clickbait and your audience will trust you less. Trying to predict the best title upfront is also usually an exercise in futility.
But also, it’s kind of weird writing an article without any title, and having something to start with feels a lot more natural.
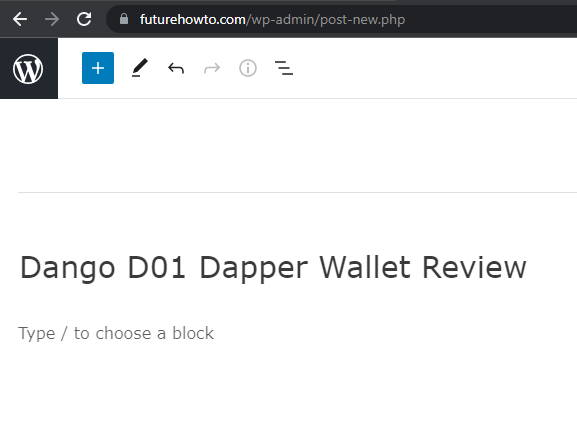
That’s why we will a placeholder title, and we will always start the blog posts with it. To start, simply enter the initial keyword you’re writing for.
For this guide, the initial placeholder title will be “Dango D01 Dapper Wallet Review”. Use camel casing for the title in most cases, it simply grabs more attention (camel casing means that the first letter of each word is a capital letter).
Research the product
If you don’t own the product at the time of writing the review, the next best thing to do is research it online.
In this case, simply go through all of the existing content about this product.
Use an incognito browser window for the research. Most of the audience for this content will be English-speaking people living in the US, and you want to get as similar of an experience as the typical reader might get, so while on the Google site, set the language to “English” and the region to the US.
See what the competition has to say about it, and check both the blog posts and the Youtube videos (I like watching most of the videos at x1.75 speed, that saves a lot of time).
If there are some forum entries on the topic, go through them as well. They can often provide questions or insights about the topic, some of which you may even use as headers or inspiration for content later.
Check out the product on social media too, you don’t need to spend a ton of time there but try and gauge the chatter and the buzz around the product, and try and get a feel for the context around it.
A bonus step that doesn’t always apply (and it doesn’t really apply in this case, either) is to do some extra research on Google Scholar. In case you’ve never heard of it, this is a free search engine by Google that focuses on scholarly literature, research, and scientific material. By doing this, you will not only gain the deepest form of expertise on your topic, but you will also spot potential articles you can link out to and quote, which is extremely important. However, Google Scholar is not likely to have any useful material on a commercial product like this, so you may simply skip this step when you do product reviews and only perform it for educational content.
In summary, consume every bit of content that exists already, and see if you can identify if the existing content misses out on something.
Besides the reviews from the competition, you should pay close attention to the reviews from the independent owners on the large online store listings. In fact, that should be the primary source of knowledge about products like these, and that’s how to form an initial opinion on them. In this case, the biggest listing for this product is on Amazon (it will usually be Amazon).
In a lot of cases, you will not be able to go through all of the reviews, especially when it comes to popular products. In this case, for example, the Dango D01 Dapper has 2681 reviews on Amazon at the time of writing this, and it’s not necessary to go through all of them. Instead, what you should do in this case is go through what Amazon considers to be the top reviews, which are the reviews where the most people have reported as helpful, but also going through some of the most recent reviews (sort by “Most recent”), and, of course, go through all of the 1-star and 2-star reviews, as they often have the most insight, the most valuable information about the product that the readers might be interested in, and there’s usually not a lot of them for the popular products so it’s not too time-consuming.
Additionally, you should go through all of the customer questions and answers on Amazon about the product, numbering 111 in this case.
Take notes of anything that might be useful, or of any recurring themes you notice.
Do all of that, and you will be more knowledgeable about this product than 99% of people. That already gives you enough expertise to review the product, and you will be able to provide the best nuggets of information to your audience and to talk about it with authority.
Don’t skimp on this step (I know I’m often tempted to do so). Truly do a deep dive into the topic. Trust me, it will pay itself off.
Research the competition
Related to the previous type of research, while we are checking out the competition, we will take note of the following elements of their content:
- headers and header structure
- total word count of their content
- merchants they recommend
- outbound links
I like doing this for all of the review articles on the first page of the Google search results for the keyword.
You will usually find that most of the competition has very similar or identical headers. We will also be doing the same. That’s just the way it works – we can’t really reinvent the wheel completely.
For now, just take note of all of the headers and their levels (whether they are H2, H3, etc, you can find this out by right-clicking the header and selecting “Inspect” and then seeing whether the HTML tag is “<h2>” or “<h3>” in the developer console).
Another very important step here is to take note of the word count of the articles of the competition. Use the simple browser extension called Word Counter Plus for this. Just select all of the text from the article (don’t select other text like the menu and the footers etc), then right-click and select the Word Counter Plus option.
Take note of all of the word counts of all of the competitor articles. This will almost always set the goal for our own articles. We will simply see which article has the most words, and we will aim to outcompete that number with at least 10%-20% extra.
Keep in mind that this is not a rule that’s set in stone, as content length alone is probably not a ranking factor. However, many studies have consistently shown that higher-ranking articles tend to be longer, and longer articles are usually more in-depth and more informative, so aiming for a bigger word count is a good approximation to reaching that goal. Longer content tends to be better, as long as it’s relevant to the topic being discussed, and since we will always create relevant content in our articles, the length will be our advantage.
There are several ways to create better content and have it rank higher. You can have a greater experience with the product or the topic, you can have better images, you can have more backlinks from stronger websites, and, of course, you can provide more, better, clearer information. The latter will be our weapon of choice. It’s quite a time-effective and cost-effective method compared to the other methods, and I’ve found great success with it in the past, and that’s why I recommend it as a valuable tool to create great content when the other methods are less feasible.
We don’t have to always cram in more words than the longest competing articles, as sometimes they have a lot of words but cover a lot of irrelevant topics and steer away from the main topic. Anyway, it’s a good estimate to use, and we will mostly stick with it.
The final element you should evaluate in the content of your competitors is their links. See their outbound links in general, maybe they point to an authoritative resource that we can maybe use ourselves or find a better one of the same kind.
Also, see the online stores and merchants they recommend as well, and if they recommend a merchant you haven’t heard of, see their affiliate program, too. Maybe they offer a better deal. See if the competition also offers some coupons or discounts for their audience, we should at least match that in our offer, and preferably try to offer something better.
So, in this case, when I Googled “Dango D01 Dapper wallet review” and researched the competition as I described, I came up with the following results:
- there were no interesting ideas for headers, at least none that I didn’t think of already
- the biggest article had 1381 words, which means my goal for this article will be at least 1800 words (the final result had somewhere around 3800 words!)
- the competition recommends the same merchants that we had in mind
- there were no other interesting outbound links in the articles from the competitors
Additional Google research
After you’ve done the research, it’s time to see what Google thinks of the keyword.
The additional data points you will take into account are:
- the Google autosuggest options for the keyword
- the questions in the “People also ask” section
- the keywords in the “Related searches” section
It may happen that some of these return no results.
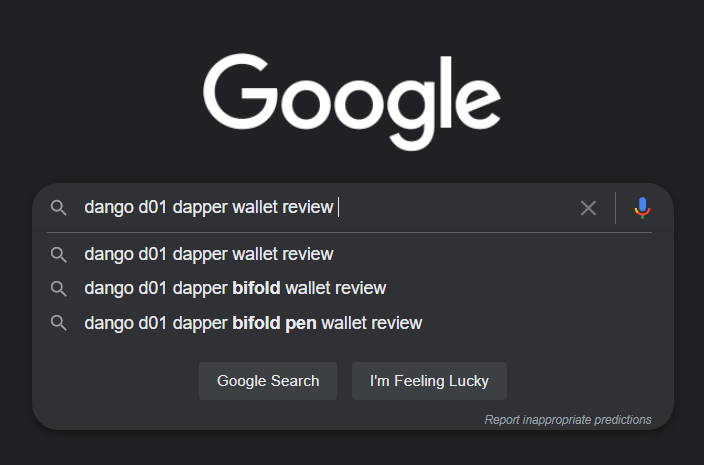
In our case, the autosuggest returns no results, in which case you may want to try some of the “alphabet soup” technique, although in this particular case it’s not necessary, as this is not a very competitive keyword and we don’t need that much ammo for the content.
The “People also ask” section does provide some results, but they are more general questions about the Dango brand, and they are not particularly useful to us in this scenario. If the questions were specific to this product, we would have taken note of them, and then also expand and contract them so that Google provides us with some more questions.
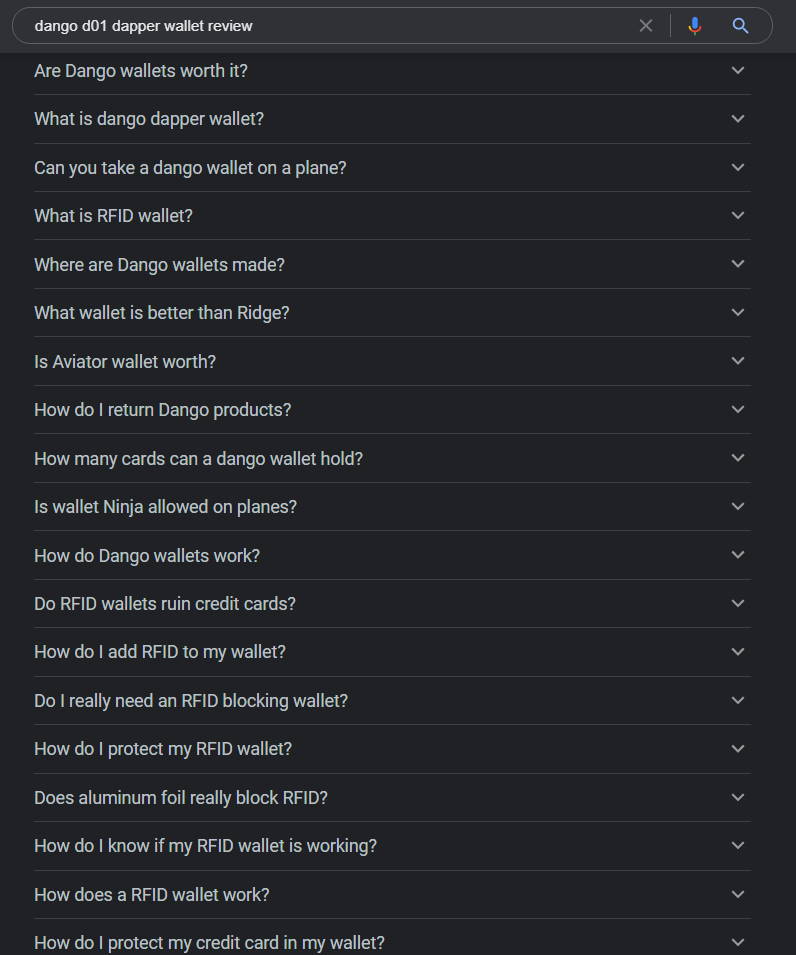
We might still use some of these questions, though, as we can take some of the general brand questions and make them specific about this product.
For example, we can take the “Are Dango wallets worth it?” question and turn it into “Is the Dango D01 Dapper wallet worth it?”. This may or may not be used in the article, but we will take note of it. We will do the same for all of the other questions:
- “Can you take a dango wallet on a plane?” will become “Can you take the Dango D01 Dapper wallet on a plane?”
- “What is RFID wallet?” will become “Is the Dango D01 Dapper RFID?”
- “What wallet is better than Ridge?” will become “Dango D01 Dapper vs Ridge”
- “Where are Dango wallets made?” will become “Where are Dango D01 Dapper wallets made?”
We are just taking note of these for now, we are not yet sure which ones we will use, but some of them might become headers in our blog post, or questions under an FAQ header, etc.
Finally, in the “Related searches” section, we also see a few other keywords that don’t seem too related to this specific product, but we will try to make use of them anyway. We will just take note of these for now and maybe use them in the article later somehow:
- Dango Dapper Bifold wallet review (this is probably another Dango wallet, might compare it against our product in the article)
- Dango D03 Dapper wallet review (this is also another Dango wallet, we will compare it against our product in the article)
- Dango pen wallet (probably another Dango wallet with a pen, might compare it against our product in the article)
- Dango wallet vs Ridge wallet (Ridge is another wallet brand, we will definitely compare our product to some of the popular Ridge wallets)
- Dango wallet Amazon (we will talk about where to get the product, and Amazon will be one of the choices)
- Dango wallet warranty (we usually have a warranty section in our reviews, and this lets us know that we’re headed in the right direction)
In certain cases, you may want to repeat this entire process on some of the related searches as well, but we don’t need to do this in this particular case.
Reflect and empathize with your readers
In the next phase, you should pause briefly and take a minute to reflect on the topic you’ve researched, as well as the notes you have so far. This is your chance to stand out.
If you have direct experience on the topic, this should be the focus of your article, but otherwise, as in this case, you should spend some time simply thinking about the product, and the people that are likely to use it. Even more importantly, think of all the different types of people that might use the product, and all of their different possible scenarios and use cases. All of that will be very useful when you write.
Simply put, spend some time being a human being here. Spend 5-10 minutes calmly thinking about the product and the people that will use it. This is critical for relevancy, and yet so many people skip it and just produce garbage content, and then wonder why they don’t rank.
Put yourself in your reader’s shoes, adopt the beginner’s mind again, and think about what would you like to see in a blog post on the topic. For this particular example, I’m thinking about:
- how this wallet would affect my everyday life
- whether it would fit right in or stick out like a sore thumb
- how will it look like in my pocket
- what color would I like it to be
- whether it is big enough for all of the things I’m carrying in my wallet usually
- will I have to change something in my life to make room for this new product
- should I spend this much money on a simple wallet
- will it make me look cool
- will it draw too much attention and make me look like a tryhard
- will people ask me about it when they see it and what will I say
- will it be so small that I may lose it easily
- should I be more or less worried about pickpockets
- will it get tangled or stuck with other objects in my pocket
- can it damage my clothing
This can easily go on and on. Just open up your mind a bit, meditate on the product and its use cases, and thoughts will usually begin popping into your mind on their own.
Again, take notes.
I can’t tell you how many times I’ve skipped this step out of laziness or because I’ve rushed things, and ended up writing something that’s totally different from the topic and completely missed the mark. Google values and recognizes relevancy more and more, so just stop, breathe, and think as your reader would for 5 minutes before you continue.
Create the header structure
This will be one of the most important steps of the blog writing process. If the header structure is set up correctly, writing the content itself is a lot easier. The header structure is the skeleton of the blog post, the template, and getting it right almost makes writing like a fill-in-the-blanks type of exercise.
You should spend a good amount of time here thinking.
In general, coming up with the header structure will be the hardest for your first product review in the niche, which is the case for us here, too. We have to come up with the entire header structure now, but for the second wallet review, we will mostly reuse the same header structure and maybe only change small parts in it.
Just a bit of theory: the best practice is to have just one H1 header, which will be the title of your blog post. This is the default setting in WordPress. The main headers will be H2, and the ones within them are H3, etc. I’ve found the best success by making the most important concepts be some kind of an H2 header, and then each of them having as many H3 headers as it would make sense. Google loves well-organized content, and plenty of H3 headers under relevant H2 headers give strong signals that the content is helpful and in-depth.
Think of a logical, natural progression of the material, how it should flow in the reader’s mind when they read it. We will break that natural flow a little bit so that we can make the articles more profitable, but in general, we will try to follow a smooth progression, from a general introduction to the product, to the meaty details of the topic ordered by importance and relevance to the audience, to a summary and a final call to action.
We will make use of some of the keywords we found in the previous phases. Some of them might be headers themselves, and others may need a little tweaking before they become headers.
The questions, problems, and ideas we came up with in the empathy phase can also be headers as well. Maybe we can have an FAQ section, but I’ve found that H3 headers that live under their relevant H2 header work better, as all the relevant content is grouped and close to its cluster.
We will also make use of the headers of the competition we gathered before. A lot of them will be the same for us as well, although it’s very worth thinking about ways to improve the header structure here at least in terms of organizing the hierarchy and the progression. In general, avoid copying the headers from the competition entirely, but also know that some similarity is inevitable, and search engines probably know that as well.
Also, we will employ a technique from the keyword research phase here again, and plug the keyword into tools like the Google Keyword Planner and Answer the Public, as well as the general keyword list for the niche. Chances are, at this point, they will not provide any new ideas, but sometimes they will. It’s also a very good idea to think about synonyms of the headers and check all of them individually in the Google Keyword Planner – you may find a synonym with a higher search volume, and that’s always the better option to use.
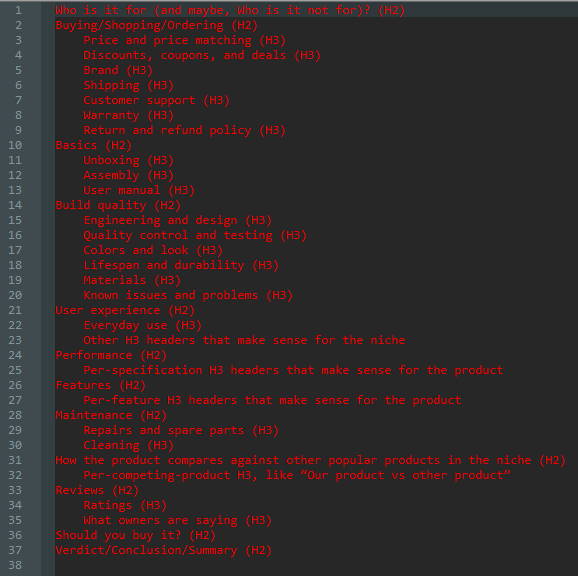
Another critical set of headers will be some of the default headers you will often use in product reviews, and especially the ones that you will use in product reviews of this niche. We will often use some or all the following headers in pretty much all of the product reviews:
- Who is it for (and maybe, Who is it not for)? (H2)
- Shopping/Ordering (H2)
- Price and price matching (H3)
- Discounts, coupons, and deals (H3)
- Brand (H3)
- Shipping (H3)
- Customer support (H3)
- Warranty (H3)
- Return and refund policy (H3)
- Basics (H2)
- Unboxing (H3)
- Assembly (H3)
- User manual (H3)
- Build quality (H2)
- Engineering and design (H3)
- Quality control and testing (H3)
- Colors and look (H3)
- Lifespan and durability (H3)
- Materials (H3)
- Known issues and problems (H3)
- User experience (H2)
- Everyday use (H3)
- Other H3 headers that make sense for the niche
- Performance (H2)
- Per-specification H3 headers that make sense for the product
- Features (H2)
- Per-feature H3 headers that make sense for the product
- Maintenance (H2)
- Repairs and spare parts (H3)
- Cleaning (H3)
- How the product compares against other popular products in the niche (H2)
- Per-competing-product H3, like “Our product vs other product”
- Reviews (H2)
- Ratings (H3)
- What owners are saying (H3)
- Should you buy it? (H2)
- Verdict/Conclusion/Summary (H2)
As you can see, even that generic structure will apply to most products and will enable easily creating in-depth, consumer-friendly content that’s easy to scan and digest.
Finally, do another round of thinking here and see if you can maybe come up with some other concepts, ideas, or questions that may be some other headers.
Remember, relevancy is key here! You really shouldn’t add headers just for the sake of adding them, and you will likely remove most of the headers you’ve gathered previously. A lot of them will simply not qualify.
Also, while it’s great to have a solid header structure in place, keep in mind that this is also a very fluid structure that you can (and probably, to a degree, will) change as you write the content itself. While most of the structure will probably remain the same, especially if this is not the first product review in this niche you’re doing, you will find that you always tweak at least a few headers as you go along.
So, in our example, we started out with the following headers and ideas:
- Should you buy the Dango D01 Dapper wallet?
- Buying
- Price and value
- Discounts, coupons, and deals
- Shipping
- Customer support
- Warranty
- Return and refund policy
- Basics
- Unboxing
- Quality
- Durability
- Materials
- Known issues
- Design
- Look and feel
- Colors
- Features and functionality
- Everyday use
- Cleaning and hygiene
- Water resistance
- Portability, size, weight
- Fit
- Is the Dango D01 Dapper TSA compliant?
- Does the Dango D01 Dapper have RFID blocking?
- Is the Dango D01 Dapper a tactical wallet?
- Is the Dango D01 Dapper a smart wallet?
- Dango D01 Dapper vs other wallets
- Dango D01 Dapper vs Ridge
- Dango D01 Dapper vs Dango A10 Adapt
- Dango D01 Dapper vs Dango M1 Maverick
- Reviews and customer satisfaction
- Who should not buy the Dango D01 Dapper?
- Who should buy the Dango D01 Dapper?
This is more than good enough to start with, and it sets us up for creating content that will be much more in-depth than all of the content from our competitors.
In the end, however, after all the writing and modifications of the headers, we ended up with the following header structure:
- Should you buy the Dango D01 Dapper wallet?
- Buying
- Price and value
- The Dango brand
- Shipping
- Customer support
- Warranty
- Return and refund policy
- Basics
- How to use
- Unboxing
- User manual
- Quality
- Durability
- Materials
- Known issues and problems
- Design
- Aesthetics, look and feel
- Colors
- Fit to clothing style
- Features and functionality
- Everyday use
- Size, weight, and portability
- Notches
- Silicone cash band
- Paracord handle
- Bottle opener
- Glass breaker
- Cleaning and hygiene
- Water resistance
- How many cards can the Dango D01 Dapper fit?
- Capacity
- Is the Dango D01 Dapper TSA compliant?
- Does the Dango D01 Dapper have RFID blocking?
- Is the Dango D01 Dapper a tactical wallet?
- Dango D01 Dapper vs other wallets
- Dango D01 Dapper vs Ridge
- Dango D01 Dapper vs Trayvax
- Dango D01 Dapper vs Dango A10 Adapt
- Dango D01 Dapper vs Dango M1 Maverick
- Reviews and customer satisfaction
- Who should not buy the Dango D01 Dapper?
- Who should buy the Dango D01 Dapper?
Write the content
It is finally time to start writing the content.
This is probably the hardest part to explain to new bloggers, especially ones that have limiting beliefs about their writing capabilities.
Writing is a fairly intimate practice. It involves a person’s thought process, which is always a closed box essentially.
Furthermore, it is also a generative process, something that requires creativity, and no matter how detailed and broken down a blog writing process is, it will always involve an element of independent thought that neither I nor anyone else in the world can really teach you how to do. If I were to tell you “just start writing” and you don’t already know how to do it, it would be like me saying “just start speaking” to a one-year-old.
Since this whole blog writing process is very broken down and actionable, there is one bit of advice I can give you that I believe can make all the difference and help a person transition from someone who says “I can’t write” to someone who is actually writing. My advice is to look at the subheader for the part you have to write about, and let your thoughts bubble up. Simply think about the subheader, what concepts and ideas it represents, what you already know about it from your research, and what would be the most useful thing to convey to a person reading it, a person considering the option of buying the product specifically. The more you do this, the easier it will get, and you will find yourself constantly getting into a state of flow, where you do this effortlessly.
Use Grammarly at all times while writing.
If you get stuck in the writing process (or, rather, when you get stuck), you have a few smart moves available. I usually like to take another look at the product (an image of it works best), and see what else I can come up with about it. And then, of course, there’s always the option to go back to the research phase, check out the videos, social media, the reviews of the product, and even other articles about it, and see if you get a fresh set of ideas. Of course, never blatantly copy other people’s work, as that will get you penalized eventually, but feel free to get inspired by any other material out there.
The first paragraph can be troublesome sometimes if you’re trying to write it first. It is a well-known saying that there’s nothing scarier for a writer than the blank page, and there’s a good reason for that. That’s why I sometimes avoid the first paragraph and simply start anywhere I feel it might be the easiest to start, and that starts to put me in a state of flow. Also, I usually use this technique to make progress when I’m stuck for a longer period of time – I simply go do another part of the review and come back to the harder part later, and usually, I’m ready to complete it then.
However, in an ideal world, it’s probably best to start, well, from the beginning, and progress as sequentially as you can. And luckily, we can follow a proven formula to write the first paragraph effectively and yet without too much effort.
Write the introductory paragraph (state the problem, connect with the reader, use the keyword)
The first paragraph is very important because it is the first place where you can easily lose your reader. There are plenty of mistakes that bloggers make here, mostly related to trying to sound fancy, smart, wordy, selling too hard too soon, or outright lying.
Avoid all of those temptations. The simplest way to do that is to follow a proven formula, which is the problem + connect + keyword formula.
It is exactly as it sounds. If the first paragraph has those 3 parts and not much else, it is already a great first paragraph. What do they each mean?
State problem is just that – simply state the problem that you will be writing about in the article. Try to do it as naturally as you can.
Connect is the part where you connect with your reader. This can be a short sentence on how you’ve personally experienced the problem, or what you’ve observed or learned about it, etc.
Finally, using the keyword close to the top is an old-school SEO practice that may be helpful even to this day. Simply try to include the keyword naturally in the first paragraph. Now, don’t fall for the temptation to include it at any cost. This is not an obligatory part – if it doesn’t sound natural, you can skip this. But if the keyword can fit in the first paragraph while still sounding natural, great.
With those 3 parts, you can always craft a great intro paragraph rather easily.
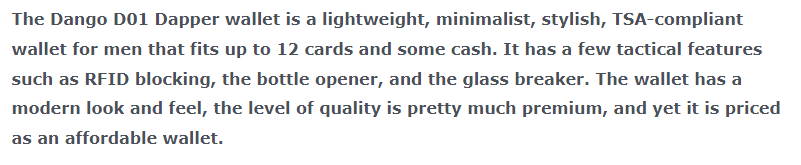
In our example, the first paragraph can be something like:
“This is a detailed review of the Dango D01 Dapper wallet. We will go through every single aspect of it, all its good and bad sides, and see if it is the right choice for you.”
Nothing fancy, as you can see, but still a decent intro, it simply explains what the article will be about, it states the problem it will solve (who should buy the wallet), it connects with the reader by promising a way for them to make up their mind about the product, it uses the keyword, so basically it gets the job done.
Write the bridge to the content
This will usually end up being the third or fourth paragraph in the article. The reason why we skip the second paragraph, for now, is because we will do it at the end of the article.
The bridge paragraph is somewhat optional and can be skipped. It can be a single sentence that simply eases into the content, something that simply says “let’s dive in” (and sometimes it will literally say that).
Also, if you didn’t use the keyword in the first paragraph, you may try and use it here.
In our example, we will not use a bridge paragraph because we don’t really need it.
Write the main content
Start writing.
You will find that your job is now much easier thanks to the existing header structure. Simply fill in each header and subheader with content that explains, expands, informs, or educates on them. Your primary responsibility to your audience is to educate them, and almost every sentence in your blog post will serve that purpose either directly or indirectly.
My writing technique is what I like to call the “talk to your friend” technique.
Just imagine like you’re talking to a good friend (not your best friend maybe since that’s all internal dialogue and bad jokes etc).
Explain, inform, give your two cents and friendly recommendations. Don’t judge, don’t go out of your way to offend, and don’t lie.
Use both your personal perspective, but also refer to other sources and explanations when it makes sense.
Be specific and determined.
Tell the truth, which will often involve a lot of ifs, ands, buts, ors, maybes, etc. At the same time, avoid being too wishy-washy unless necessary.
Avoid fluff, slang, cursing, and filler words as much as you can.
While some humor is fine here and there, don’t try to go for it, maybe only if it happens naturally.
Avoid sarcasm – very few people truly like that, especially in this type of content.
Try to maintain a professional, but still somewhat unofficial tone (you still don’t want to bore your users to death).
Use short, clear sentences.
Avoid overcomplicated words for the sake of just using them, although don’t fear them if they fit the context and they are the best choice.
Use short paragraphs as well. Even one sentence can be a paragraph (sometimes even quite a powerful one).
Break up long sentences into shorter ones.
Same with paragraphs.
Cut out words and phrases that are not necessary. We do want a large word count, but it should be relevant content, not filler content.
A bonus SEO tip: if the header is a question, answer it immediately by using the snippet technique from above. That will increase your chance of that particular section ranking for that question.
Also, after every header section ends, use a bridge. A bridge is a writing technique that piques the reader’s curiosity by helping them relate to the next section and transition in a more fluid way. Examples of bridges are “speaking of…”, “which brings us to…”, “on a related note…”, etc.
Finally, have a bit of fun. Not too much, but have some fun. Writing should be fun for you and your audience as well. Tell stories and talk about your experiences on the topic.
It always helps me to remind myself of a phrase when I find myself bored by writing. I simply think: “My research and experience flow from my brain, through my fingers, on the screen, and someone far away will find it useful”. Not sure how I came up with that little mantra, but it really helps me keep going.
I never look at the competition to get inspired to write content. I believe that’s a bad practice and you should avoid it as much as possible. Of course, never copy your competitors’ content either, Google can easily figure that out today and punish your blog (for Digital Marketing Empire team members, know that your content will be checked for plagiarism anyway, and you will be banned from the team if you attempt that).
Beyond these tips, the rest is up to you. I can write 40 more articles on how you should write, but that won’t make you a much better writer. Writing your first 10 blog posts will. Writing your first 100 blog posts will make you an expert writer. Writing 1000? That’s already world-class.
That’s the game of writing. Start, fail, improve, and win. The result is awesome content.
In our case, we will simply talk about the Dango D01 Dapper wallet, and we will expand on each of the headers we’ve prepared so far. Simply go check out the published review of the Dango D01 Dapper if you want to see the final results of the writing process, or watch the video of this guide to see me write the content word by word, as I think that might be quite helpful for some.
Write the summary/call to action
The first few and the last few paragraphs of the blog post are both special in a way. Those are the only two paragraphs where, while you are still an educator, you are also thinking a lot about your marketing as well.
That’s why the last few paragraphs that summarize the content and nudge the reader to take a certain action (usually click the link to check out the product) are very important as well.
I also like to have an additional call to action close to the top of the article as well. I’ve found that this additional call to action can greatly increase the profits that the article brings by accommodating impulse buyers and giving them what they’re looking for sooner.
Anyway, the best way to both entice your readers to buy the product you’re recommending, and also earn their trust at the same time, is to state as clearly as possible who should buy this product, and who shouldn’t buy it.
This is pure gold.
First of all, there are a million ways to slice this, and you can make it seem like you’re recommending this product to only the 50% of people who will truly benefit from it the most, when, in reality, you can craft the message to cover something like 90% of your entire audience.
But even more important than some clever wordplay is being genuine, which is my preferred approach. When you think a certain type of person will not like the product being reviewed, simply say so, in an honest and straightforward manner.
And guess what happens then?
The people who believe they belong in the group that should buy the product have more trust in your recommendation because you’ve taken the risk to divide the audience into buyers and non-buyers, and you’ve inevitably decided not to sell to a significant part of the audience.
And the other group of people, the ones who shouldn’t buy the product? Well, you simply point them to another review of a product you’ve done, a product that will be much better suited for them. Their trust also increases, and they go and read another review of yours and maybe buy another product that you recommend.
The alternative to the approach from above is to recommend every single product you review to everyone, and every product on your blog is the “best”. Everybody can see through that.
For the guide we’re working on as an example, the call to action will be the entire section under the “Who should buy the Dango D01 Dapper” subheader, almost at the end of the article.
Write the second paragraph, go for the Google snippet
This is another critical component of most of the articles we write, and that’s why we will write it last.
The purpose of the second paragraph is to win the featured snippet in the Google search result. The reason why you should not write the second paragraph immediately after you write the first one is because you will probably have to go back and change it. The second paragraph will summarize the entire article, and it’s best if the article is already complete beforehand so that you know what you are talking about.
When it comes to review articles, Google doesn’t often offer snippets to the searchers, but it does sometimes, and it’s very good when we can win those. This is a great hack for new blogs that may still not have a lot of authority, as Google can often give the position 0 to the best snippet even if it doesn’t come from the most authoritative blog. So that’s a great opportunity for new bloggers to skip the line, and there’s a lot of weight resting on the shoulders of the second paragraph (sometimes it may even be the first paragraph if it makes sense).
In our product review, we will basically try to review and summarize the product in a few concise sentences that are still packed with information.
You can also announce the snippet paragraph in the previous paragraph, by simply restating the topic as a question. In our case, we may have the snippet paragraph preceded by “So, why should you buy the Dango D01 Dapper wallet?” or something along those lines. In a way, let your readers and Google know that the short and sweet answer is coming.
The snippet paragraph itself should be self-contained. That means you can read it as a standalone mini-article, and still understand what it’s about, even without the question.
Simply give a dry, short, boring summary of the topic, without any fluff.
Use as much data, numbers, percentages, and examples as you can.
Pack it with information, and try and cut out as many unnecessary words as possible.
Try to not exceed 70 words, and aim for about 3 compact sentences.
Have the entire paragraph in bold.
Try to add a relevant image for the snippet immediately after it – this greatly increases your chances of ranking in position 0.
Writing good snippet paragraphs is a bit of an art and a science. These are all very good guidelines that you should follow, but you’ll also have to gain some first-hand experience. Don’t worry – you will soon start winning a few snippets and you will quickly gain a feel for how to do these best. Start by following these tips and you’re on a very good path.
Create lists and tables
Both search engines and readers love to see data represented in as clear and detailed a way as possible.
Whenever it makes sense, use bulleted lists in your content. Use lists even you have to number just 3 items. A lot of paragraphs simply become lists like this.
Also, whenever possible, try to turn lists into tables. If the information you’re trying to convey has at least 2 dimensions, that set of information is a great candidate for a table. Always add headers to your tables that describe the dimension, add footers if it makes sense as well, and always set the tables to have striped rows as those are easier to read.
Include as much raw data and research in the tables as it makes sense.
For the product review we are creating, we will have a few lists which you can see in the article, but the only table we will have will be the specifications table.
Add the product specifications table
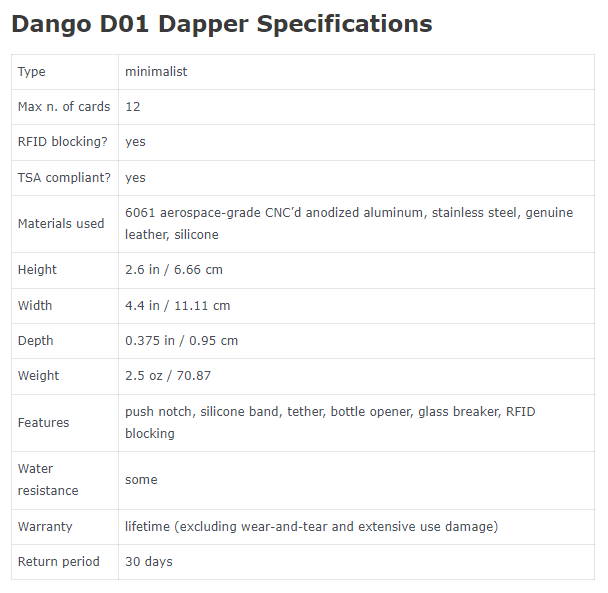
Besides the tables you will add in the previous step, you will also add one specific type of table in every product review, and that’s the specifications table.
This is a simple but very useful table that will typically be the most complete specifications table about this product available on the Internet, not just because we will gather all of the data, but because we will turn some other, seemingly unquantifiable data into the name-value form, and add it to the table as such.
A great example here would be “materials used” – we will just enumerate all of the materials used for the creation of the wallet and add them as a row in the specifications table. We will also do this for a few other data points, and that way we will provide the most detailed specs table online, often even more detailed than the one from the brand itself.
In our example, the specifications table will be placed at the very beginning of the article, right under the featured snippet so that it’s quickly available to readers. That’s often the best place for the specifications header to be placed in, although sometimes it can go at the end of the article as well.
Place the “Table of contents” widget before first H2 header

If you’ve seen some of my other guides on blogging, you may know that I swear by the Lucky WP Table of contents plugin.
Simply add the table of contents widget before the first H2 header.
This super-simple hack is an SEO nugget. I’ve found that Google loves the table of contents as it helps it with indexing your article.
This is specific to my way of doing things and to Digital Marketing Empire team members.
Most themes will already add some sort of an author widget to the blog post automatically. I like to have full control over this, however, so I always create a custom HTML widget that I add at the very end of the blog post myself.
Select the category
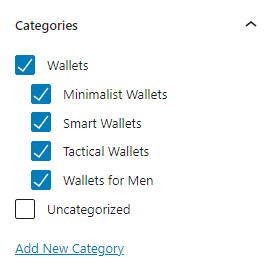
This is just a technical step, simply select the blog category under which this article belongs. Typically, your blog will either have a category based on the niche of the product, or a category like “reviews” or similar if your blog is just about one niche.
In our case, we simply select all the relevant categories under the “Wallets” category (“Minimalist Wallets”, “Tactical Wallets”, “Smart Wallets”, “Wallets for Men”), including the “Wallets” category itself.
Set the permalink
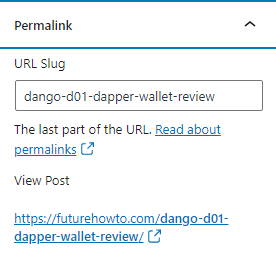
Just set the permalink of the article to be the same as the keyword you are targeting, with hyphens instead of empty spaces, and all of the letters in lowercase.
For our guide, the permalink will be:
“dango-d01-dapper-wallet-review”.
This is a general step from my blog writing process, but it doesn’t really apply to product reviews all that much. Typically, the only outbound links you will have on product review articles will be affiliate links.
You may still link out to a few high authority websites if they are very relevant to the product, even from a product review, although I would recommend keeping that to a minimum, as you don’t want your readers drifting away to content that doesn’t earn you any money.
Whenever you link out to websites you’re not an affiliate for, make sure to turn on the “Open in new tab” setting so that if a user navigates to another link, they don’t forget about your content as well and have it opened in the previous tab.
Use the plugin called Thirsty Affiliates to protect your affiliate links and for reporting on how many of your readers click them.
Also, you don’t have to do this as a separate step, and you can do it as you write. In fact, that’s probably a better way to make sure you don’t forget any links.
Finally, one very useful tip that helps your readers tremendously while increasing the chances that you generate an affiliate commission – create affiliate links for other pages on the merchant’s website and place them in your article. You can link out to the merchant’s contact page, warranty and return policies, and other pages that will fit into the content. Simply help your readers find out more about the brand by mentioning these additional resources.
Here’s a great example of how this may help you earn more money in practice. For some of the readers, your article will be the second or third review they read for the product. They may have even clicked a link from one of your competitor’s before, and they may already have your competitor’s cookie in their browser. However, when checking your review, their attention may be drawn to your link to the product’s warranty page, for example, and if they click your affiliate link to it, then your cookie will be the last one in their browser. So, even if they’ve happened to read a better review than yours, you will now still get the commission for the sale.
In the example guide, we will link out to Dango’s policies page, their contact page, their about us page, and a page where they specify their patents.
Link out to your content
This is another general step from my blog writing process that’s not really too applicable in product reviews.
In general, you should aim to create as many internal links as possible, as long as they are relevant and not forced. In product reviews, however, your readers are likely close to the end of their buyer’s journey and might be ready to buy the product, so you may not want to distract them with other content too much.
There are a few exceptions here, though.
One of them is when you are trying to increase the rankings of another article of yours, a list article in particular. We could link out to an article called “best minimalist wallets”, for example.
Another example is other product reviews. If this particular product is not a good fit for a certain type of people, you will recommend they see another product review of a product that’s better for their needs (and in some cases, use an affiliate link to the other product itself).
Since this is the very first article on this blog, there’s currently nothing to link out to. However, this is a fairly straightforward process.
Create graphs, charts, infographics, and illustrations (if applicable)
This step involves images for the article, but ones that are a bit more advanced, such as graphs and charts representing some data, some interesting infographics that we can quickly create in Canva, some cool illustrations, etc.
This step is mostly useful to other blog post types, such as “best X for Y” articles and educational or informational articles, and also for product comparisons. For product reviews, we will mostly use images from the product, although in certain cases we might add advanced images as well.
In this case, we will not be using any advanced images.
You may know that you can always use copyright-free images from a bunch of free sources:
However, when it comes to product reviews, the likelihood of finding free stock images of the exact product you are reviewing is pretty low.
In the scenario where you have access to the product you’re reviewing, the obvious best step is to take many, many pictures of the product yourself.
Don’t obsess over the quality of the pictures – very few members of your audience will truly care about that. In fact, a degree of amateurism will probably look more authentic and relatable.
Just take many pictures of the product, in as many different contexts and scenarios as you can, from as many different angles, and highlight as many of its details as you can. Also, take a few pictures of yourself either using or holding the product – that will build your credibility even further.
Now, when you don’t have access to the product, you will have to think a bit outside of the box here.
For starters, you will generally rely on pictures from the brand or the manufacturer of the product. You should be able to use their images to promote their product, although getting permission from them would be better, of course.
Another solid option to try is to look for images of the product on social media. Avoid the profiles of your competition and search for pictures from regular users. Pinterest and Instagram are the best options here, but Facebook can work as well.
Keep in mind, however, that you should always get permission from the owners of the content to use their pictures on your blog. A simple outreach message where you offer to credit them as the source of the image should be enough, and if they don’t give you permission, don’t use that image.
You can apply a similar strategy for Youtube, where you will grab screenshots from the videos of the products, and ask the Youtubers for permission to use those screenshots and credit them as the source. Again, make sure to avoid competitors, as they will likely refuse your request and you might get some unwanted attention to your blog. Make sure that the channel doesn’t have a website related to it, as in most cases they will actually have a review of the product themselves.
The best option here is to find the Youtube channel of the brand behind the product, and capture screenshots from their videos. Since you are an affiliate for them and promote their products, they will almost always have no issue with you using their content in this way, but still, always make sure you have permission to use the content.
After you’ve added all of the images, make sure you also add descriptive alt tags to them.
For this guide, we will use screenshots from the brand’s video advertising the product, as well as images from their website. Since the article will be published before I have the permissions, I will publish it without most of the images, and add them later as I get the permissions.
Add the featured image
The featured image is an image that will represent this article in the blog feed of your blog, and the image that will show up on social media by default when the link from this article is shared. The best choice for the featured image is the first and primary image that you use to represent the product in the most general way.
That’s why in this guide, we simply add the primary image as the featured image.
Add some strategic bolds
Bolding some parts of the content is an optional step, but it’s a pretty useful one. When a text is bolded, it lets both search engines and your audience know that it is a more important piece of text. Readers that scan the text will also notice it more easily.
In general, you will bold the second paragraph entirely, and some of the key ideas from the entire article.
For product reviews, it is best to bold the most important features, benefits, and selling points of the product, as well as any text that causes an emotional response from your reader.
See the final published version of the product review and notice which parts are bolded.
Correct spelling, proofread, and edit
My least favorite part of blogging is editing.
Still, it is crucial, and you have to do it.
At this point, the majority of the writing is done, and your article is almost ready. You just have to make sure it is grammatically correct, has no spelling errors, but also no factual errors, too.
As we already mentioned, you will be using Grammarly the entire time as you are writing, and that will catch a lot of mistakes even before you do this process.
But you still have to edit and proofread with attention.
One of the most important parts of the editing process will be simplifying the language you use.
Whenever you can use a simpler way to express something, use it.
Whenever you can cut a sentence into two, do it.
Whenever you can cut a paragraph into two, do it.
The editing process can only be seen in the video format of this guide, so if you want to see how the first draft of the example guide was polished into a better version, go watch the video, the editing part is near the end.
Read the article one more time as a whole
After you’ve edited your article, it’s time to give it one final read.
The vast majority of errors should already be eliminated at this point, and you’re not fishing for that.
What you want to achieve here is to make sure that the entire article is a coherent, useful, true piece of content, that is valuable to your readers and informs them on what they are searching for.
Hopefully, you will not have to make any adjustments at this point (you usually won’t, especially if you’ve followed the process).
Also, reading the prepared article one last time, in a more relaxed way, puts you in a more creative mood and connects you with the content as a whole, which will be super important for the final creative part of the process.
Craft the title, use the keyword and add some usefulness or intrigue
Finally, it’s time to replace the placeholder title with something better. Something stronger, more useful, richer, spicier.
The first part will probably remain the same as before. You must have a rational, factual part that clearly informs what the article is about.
The second part is where you can get creative.
Think of the single most important point about the product you’ve reviewed. Think about the biggest benefit, the strongest side, or any aspect of the product that will generate the biggest emotional response from your readers. It is usually better if it’s positive, but it can also be negative.
This can actually turn into an entire lecture on copywriting. The title is where you need copywriting the most, and I strongly recommend you learn as much copywriting as you can.
For our example guide, we will use the following title:
“Dango D01 Dapper Wallet Review – Premium Minimalist Wallet For An Affordable Price”
As you can see, the title follows the formula pretty closely – the first half is the keyword, the second one pretty much describes the strongest sides of the product.
Publish

Ok. Time to push the button.
Glory awaits.
Hit “Publish”.
Done. Your article is now live, ready to rank, help your audience, and earn you some money.
Add internal links to your post from other articles on your blog
Internal linking is one of the best SEO practices, and one that’s fully in your control.
Simply put, the more relevant articles from your blog link to the article you just published, the better the article will rank. However, you shouldn’t force links, and you should only link out from the places in your other articles that make sense and are somehow related to this new article.
For a product review, you will generally find all of the other articles that mention the product, and link from there to the review. Typically, this will be list articles, “best X for Y” articles, comparison articles, but some educational articles can also link to product reviews, too.
Since this is the very first article I published on the blog, I will not be able to demonstrate how to link to it from other articles. It is fairly straightforward though, and you should be able to figure it out following the guidelines provided. Once this blog has more articles, I will either update this section or do an entire guide on interlinking.
Promote the blog post
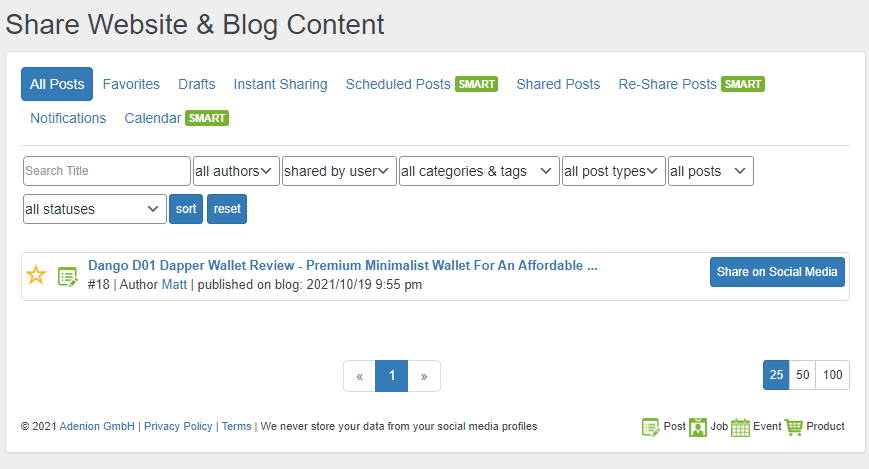
Besides the regular promotion you do for the blog in general, it helps a lot if you do a little bit of promotion right after you publish an article.
By performing a quick routine of sharing the article on your social media channels, posting it in online communities if it makes sense, doing some quick skyscraper link building, and maybe some more outreach, you will make sure that your article gets indexed faster and has an extra edge.
Since promotion is a different process than writing, I will do an entire guide on it (coming soon).
Shoot a video for the blog post
This is another very useful step to perform after the blog post is published, especially when it comes to product reviews.
Creating videos and publishing them on Youtube is the future of affiliate marketing. The blog will always be the primary point of focus, and probably the content that earns you the most money, but moving forward, blogs without a strong Youtube channel that also presents the content in a video format will be at a big disadvantage.
However, the process of doing this, while related to the blog post process, is outside the scope of this guide. I will show that in another guide (coming soon).
Creating product review videos mostly applies to products that you have access to. There are ways to create product review videos even without access to the product, but that’s also beyond the scope of this article.
In our case, we will not create a product review video for now, although there is a strong chance that might happen in the near future.
Summary
There we have it. An entire step-by-step process for writing product reviews (and making money, really).
Review this process as often as you feel the need to, it can be the guide that you’ve been missing about the intricate specifics of blogging. Even paid blogging courses don’t go into this level of detail! It sure is the kind of resource I wish I had at my disposal when I first started out.
And, of course, if you want to master this process as quickly as possible and start building your own income stream along with me and an entire team of devoted marketers, join the Digital Marketing Empire team now.

- SEO, Blogging, WordPress
- Social Media Marketing
- Facebook Ads
- Google Ads
- Analytics, Measurements
- Youtube and Video
- Growth Hacking
- Much more